The mere mention of Baklava conjures images of sun-drenched Mediterranean shores, bustling bazaars, and the exquisite taste of a treat perfected over centuries. This iconic sweet pastry, with its myriad layers of crisp filo dough, rich nut filling, and glistening sweet syrup, holds a special place in the hearts of dessert lovers worldwide. For many, the idea of preparing Baklava at home feels like a culinary Everest, a task reserved for seasoned chefs or grandmothers with generations of recipes under their belts. But what if we told you that creating truly magnificent Baklava, bursting with authentic flavor, is not only achievable but surprisingly straightforward, especially when you start with ready-made filo pastry?
This article will demystify the art of making Homemade Baklava: Divine Taste, Surprisingly Easy Recipe, guiding you through each step to achieve that perfect balance of crispy texture and aromatic sweetness. We'll dive into the heart of the matter: choosing your star ingredient – the nuts. Will you opt for the earthy, robust notes of walnuts or the vibrant, slightly sweeter profile of pistachios? The decision is yours, and either way, the journey promises a reward of truly unforgettable Baklava.
Demystifying the Art of Homemade Baklava
The perception that Baklava is an intimidating dessert often stems from the intricate look of its many layers. However, the secret weapon for home bakers is readily available: store-bought filo dough. This thin, delicate pastry eliminates the most time-consuming step, transforming Baklava preparation from a marathon into a pleasant sprint. My own first attempt left me astonished at how quickly and easily I could produce Perfect Baklava: Make it Less Sweet, Crispy, and Customizable, achieving results that rivaled, if not surpassed, many store-bought varieties.
One of the immense advantages of crafting your own Baklava is the ability to control the sweetness. Commercial Baklava can often be overwhelmingly saccharine, limiting enjoyment to just a small piece. By adjusting the amount of sugar in your filling and syrup, you can create a more balanced flavor profile that allows the nutty richness to shine through. This means you can indulge in not just one, but perhaps two or three pieces of your homemade creation without feeling sugar-shocked. The divine taste you achieve will be a testament to the freshness of your ingredients and the care you put into its preparation, making it a truly rewarding experience.
Walnut vs. Pistachio: The Great Filling Debate
At the heart of any great Baklava lies its aromatic nut filling, and here's where personal preference and regional traditions come into play. While the core "Baklava Rezept" remains consistent, the choice of nuts significantly impacts the final flavor and texture. Both walnuts and pistachios offer distinct characteristics that make them excellent contenders:
- Walnut Filling: Traditionally preferred in the Levant region (Lebanon, Syria, Jordan), walnuts provide a deep, earthy, and slightly bitter note that beautifully complements the sweetness of the syrup. When coarsely ground, they offer a satisfyingly robust texture, providing a delightful contrast to the delicate filo. If you appreciate a more classic, rustic flavor, walnuts are an excellent choice.
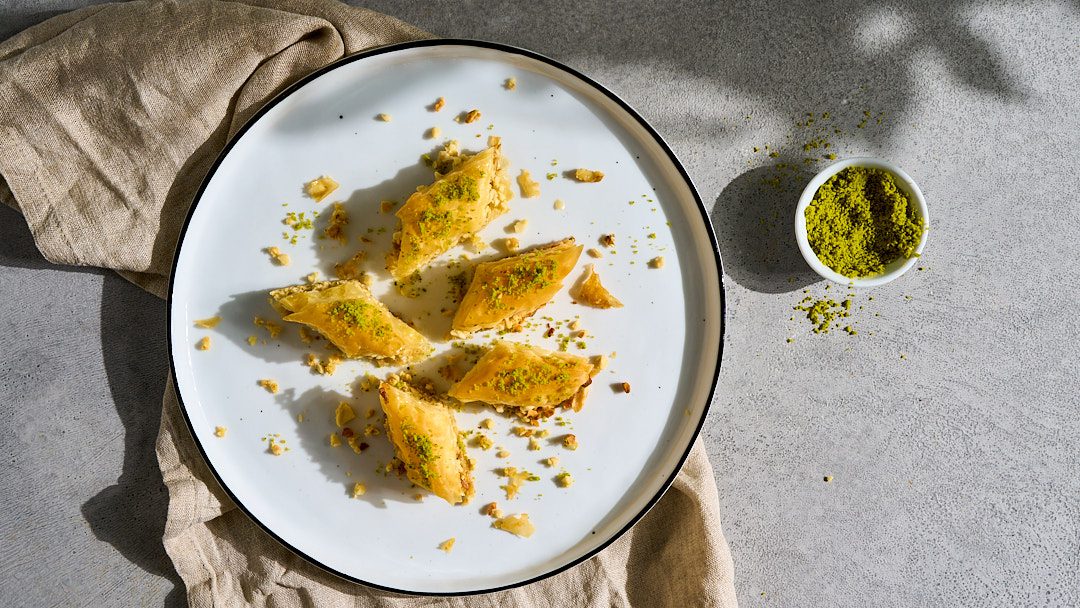
- Pistachio Filling: Highly popular in Turkey, pistachios lend a brighter, subtly sweeter, and slightly more floral flavor profile to Baklava. Their vibrant green hue also adds a stunning visual appeal. Pistachios tend to be softer than walnuts, resulting in a more delicate filling. If you're looking for a Baklava that feels a bit more luxurious and has a distinct aromatic quality, pistachios are your go-to.
For those who can't decide, why not experiment? You can use a single type of nut or even create a harmonious blend of both walnuts and pistachios. Some recipes even incorporate other nuts like almonds or cashews, further expanding the possibilities. The key is to ensure the nuts are fresh and coarsely chopped, allowing some textural integrity to remain rather than grinding them into a fine powder. This preserves their natural crunch and enhances the overall eating experience.
Your Step-by-Step Guide to Original Baklava Perfection
Ready to embark on your Baklava journey? This "Baklava Rezept" focuses on a practical, home-friendly approach, promising delicious results with minimal fuss. We'll adopt a roll-and-slice method that's incredibly efficient for assembling individual portions.
Ingredients You'll Need:
- 1 packet (approx. 450-500g) fresh or frozen filo pastry (thawed if frozen)
- 250-300g unsalted butter, melted (clarified butter, or ghee, is excellent for crispiness and flavour)
- 300g chosen nuts (walnuts, pistachios, or a mix), coarsely chopped
- For the Sugar Syrup:
- 300g granulated sugar
- 250ml water
- 1-2 tablespoons fresh lemon juice
- Optional garnish: additional chopped pistachios for decoration
Preparation Method:
- Prepare the Nuts: The first crucial step is to prepare your chosen nuts. Whether you're using walnuts or pistachios, it's vital to chop them coarsely. You can do this with a sharp knife or by pulsing them briefly in a food processor. Aim for a texture where most are roughly ground, but significant pieces remain. This provides that satisfying crunch in every bite.
- Melt the Butter: Gently melt your unsalted butter. If you're feeling ambitious, clarifying the butter (removing milk solids) will yield an even crisper Baklava with a richer flavour.
- Assemble the Rolls:
- Carefully unroll your filo pastry. Keep any unused sheets covered with a damp cloth to prevent them from drying out.
- Take one sheet of filo pastry and brush its entire surface generously with melted butter.
- Sprinkle a thin, even layer of your chopped nuts over the buttered filo sheet.
- Carefully take another sheet of filo pastry, lay it directly on top of the nut-covered sheet, and brush it with butter. You can repeat this process with a third sheet for extra crispiness, or stick to two for a lighter roll.
- Starting from the longer side, tightly roll the buttered, nut-filled filo sheets into a compact cylinder. The tighter the roll, the better the texture.
- Using a very sharp knife, cut this long roll into four or five individual pieces, each about 4-5 cm long.
- Arrange these pieces snugly in a greased baking dish (an oven-safe casserole dish works perfectly).
- Repeat this process with the remaining filo pastry and nuts until your baking dish is filled.
- Bake to Golden Perfection:
- Once all your Baklava rolls are arranged, brush the tops generously with any remaining melted butter. This helps achieve that coveted golden-brown crispness.
- Preheat your oven to 180°C (350°F) convection (fan-assisted) or 200°C (400°F) conventional.
- Bake for approximately 25 to 30 minutes, or until the Baklava is beautifully golden brown and crispy. Keep a close eye on it during the last 10 minutes to prevent burning.
- Prepare the Syrup While Baking: While your Baklava is in the oven, it's time to make the essential sugar syrup.
- In a saucepan, combine the granulated sugar and water.
- Heat gently, stirring until the sugar dissolves completely.
- Bring the mixture to a boil, then reduce the heat and let it simmer for a few minutes (around 5-7 minutes) until it slightly thickens.
- Remove from heat and stir in the fresh lemon juice. The lemon juice is crucial; it prevents the syrup from crystallizing and adds a touch of freshness that balances the sweetness.
- The Critical Soaking Step: As soon as the Baklava comes out of the hot oven, immediately and evenly pour the warm sugar syrup over all the pieces. The sizzling sound is a good sign! The hot Baklava will absorb the warm syrup beautifully.
- Let it Steep: This step is non-negotiable for authentic flavour. Allow the Baklava to sit and absorb the syrup for several hours, ideally overnight, at room temperature. This prolonged steeping is what develops the characteristic rich, sweet, and nutty flavour and ensures every layer is infused.
Tips for Baklava Perfection and Enjoyment
- Don't Skimp on Butter: Butter is key to the crispiness and flavour of Baklava. Be generous, but also ensure it's evenly distributed.
- Keep Filo Moist: Filo pastry dries out incredibly quickly. Always keep unused sheets covered with a damp kitchen towel or plastic wrap.
- Patience is a Virtue: The steeping time after pouring the syrup is crucial. Resist the urge to dive in too soon!
- Storage: Homemade Baklava, stored in an airtight container at room temperature, will remain fresh and delicious for several days.
- Garnish: A sprinkle of extra chopped pistachios on top before serving not only adds a beautiful pop of colour but also reinforces the nutty theme.
- Serving: Baklava is traditionally served with strong coffee or tea, making it a perfect accompaniment for an afternoon treat or after-dinner dessert.
Conclusion: The Sweet Reward of Your Efforts
Making your own Baklava, whether with the robust flavour of walnuts or the delicate sweetness of pistachios, is a culinary adventure that rewards you with an incredibly satisfying treat. It's an accessible luxury, proving that divine taste doesn't have to be complicated. This "Baklava Rezept" provides a reliable foundation, allowing you to bring the authentic flavours of the Levant or Turkey right into your kitchen. So, gather your ingredients, follow these steps, and prepare to impress yourself and your loved ones with a dessert that truly tastes like a labour of love, without the endless hours of work. Enjoy the golden, crispy layers, the rich nut filling, and the sweet, aromatic syrup – a true taste of tradition, made by your own hands.